Optional Course Information
Learning Outcome
On successful completion of this lesson, students will understand how to add the following additional information to each course:
- Course modules
- Course start and finish information (time and date)
- Employees (staff) who will teach the course
- Course locations
Lesson
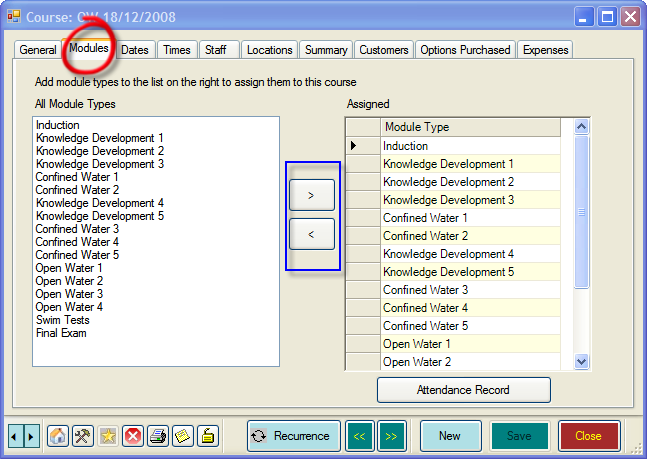
Modules Tab
- Click the ‘Modules’ Tab and add or remove modules as appropriate using the arrow keys
Dates Tab
- Click the ‘Dates’ tab to allocate dates for each module
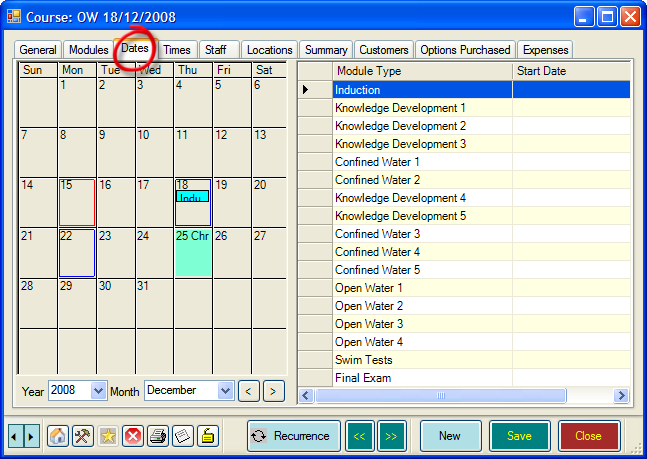
- EVE automatically selects the first module. Click on the date in the calendar panel that the selected module occurs on.
- EVE automatically selects next module. Repeat until dates have been allocated for each module.
Times Tab
- Click the ‘Times’ tab to allocate times for each module
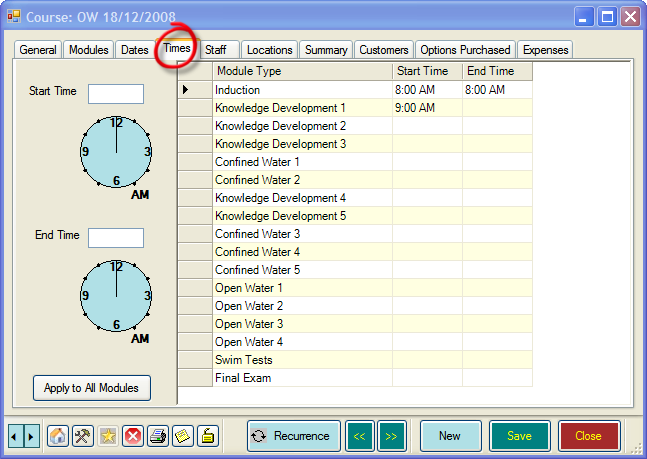
- To allocate a time, click in the Start/End Time boxes for each module. To add 8 AM, for example, enter 08:00
Staff Tab
- Click the ‘Staff’ tab to allocate staff for each module
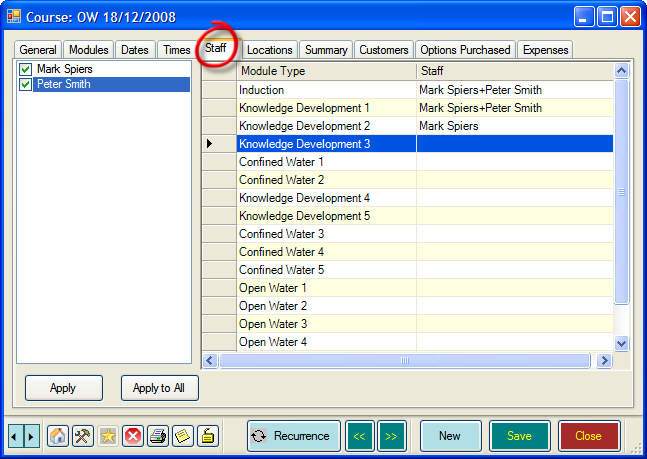
- You will need to have previously allocated staff for the course under the ‘General’ tab – see step 7 in the previous section for how to do this.
- Click the ‘Apply’ button to add all staff with a tick
 against their name to a module. If you have staff listed who will not be teaching a module simply clear the check box next to their name.
 - To add the same staff to all modules, click the ‘Apply to All’ button.
Locations Tab
- Click the ‘Locations’ tab to allocate locations for each module

- EVE automatically selects the first module. Click on the location in the left-hand panel where the selected module will take place.
- EVE automatically selects next module. Repeat until locations have been allocated for each module.