How to Create Your Audience in MailChimp (Preview)
Learning Outcome
On successful completion of this lesson, students will understand how to create an audience in MailChimp.
Lesson
One of the things that the EVE Agent requires to send emails using MailChimp is an ‘Audience’. The MailChimp audience is a essentially a list of customers that is populated over time by the customer information found in your EVE database that the EVE agent uses to target your customers with a personalised and targete promotional email/message.
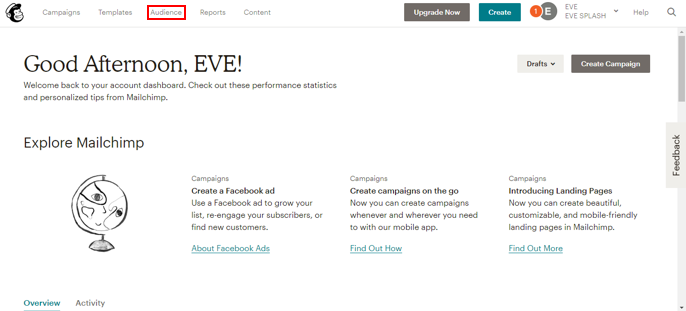
To create a MailChimp audience, you need to login to your MailChimp account and click the ‘Audience’ tab in the top menu:
If this is a new MailChimp account, on the ‘Audience’ page you will see an option to ‘Create Audience’:

Click the ‘Create Audience’ and in the confirmation box that appears, click ‘Create Audience’. This brings up the ‘Create List’ page and you need to fill in the following information on the ‘List Detail’ page:
- List name (this will be used by your EVE Agent – not seen by people who receive your emails)
- Default From email address
- Default From name

We recommend that your list name should be your dive centre’s name followed by (EVE) – for example ABCD Diving (EVE).
This will make it easy when you come to create a ‘campaign’ in MailChimp using a saved template (see the ‘How to Create a Campaign in MailChimp using a Saved Template’ lesson) and then associate a job in the EVE Agent to the right ‘campaign’ (see the ‘How to link your Job in the EVE Agent to your MailChimp Campaign’ lesson).
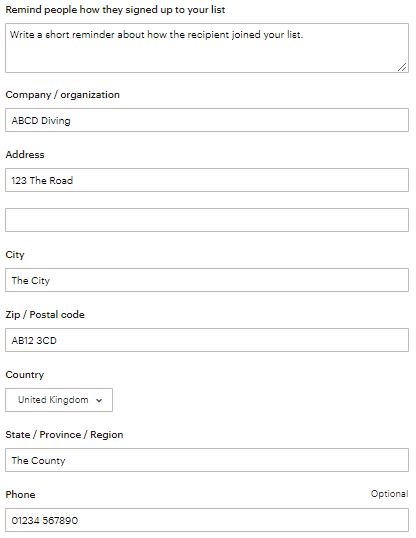
The next set of details to enter is to remind people how they will have received a marketing email from your dive centre and MailChimp requires you to enter your dive centre’s contact details:
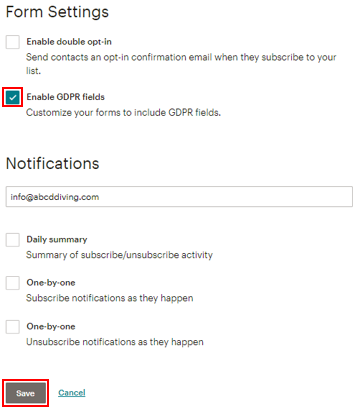
The next set of fields to complete are for ‘Form Settings’ and ‘Notifications’. In the ‘Form Settings’ field do not add a tick for ‘Enable double opt-in’ but you must add a tick to the check box ‘Enable GDPR fields’. The ‘Notifications’ section can be left blank as the EVE Agent will manage this section on your behalf using your EVE database. Once you are happy with the details you have added, click the ‘Save’ button so that your new ‘Audience’ is created.
If you have been using your MailChimp account for other emails that have been sent using the EVE Agent (i.e. you already have an ‘Audience’), you will need to create a new ‘Audience’. To do this, login into your MailChimp account and click the ‘Audience’ tab in the top menu.
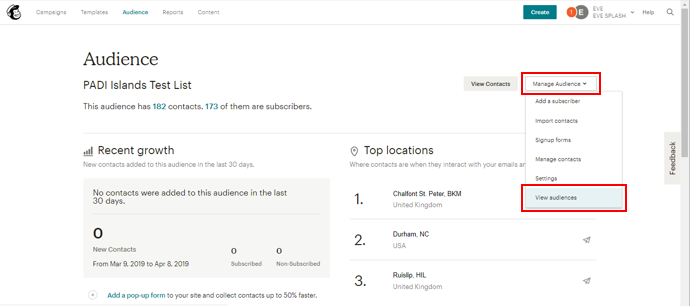
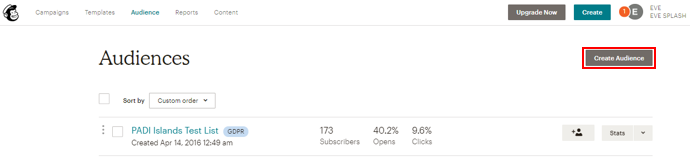
This will open up the ‘Audience’ page and you will see a list with the existing ‘Audience(s)’ and their statistics.
To be able to create a new ‘Audience’ to use with your EVE database and EVE Agent, click on ‘Manage Audience’ dropdown and select ‘View Audiences’:
This will now give you the ‘Create Audience’ button and you can now follow the process listed in the steps above to create your new ‘Audience’.
Do not worry about importing customer details into your new MailChimp ‘Audience’ as the EVE Agent and your database will do all of this for you.