Responsive EVE Online configuration (Preview)
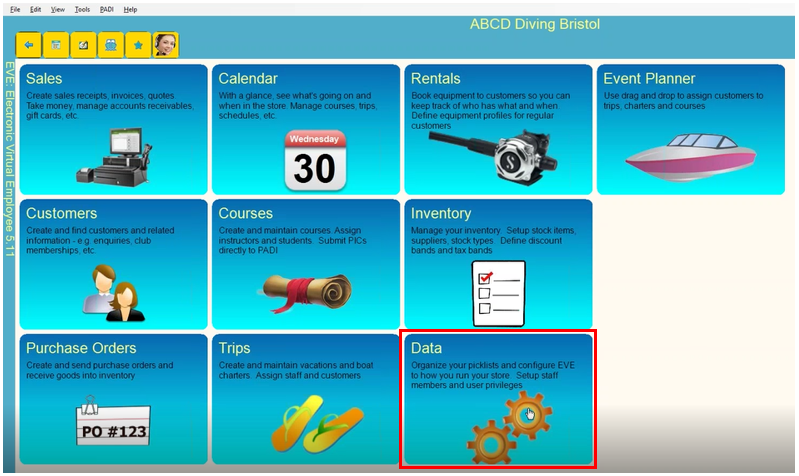
You use your EVE database to configure your EVE Online store. Click on the ‘Data’ module icon.
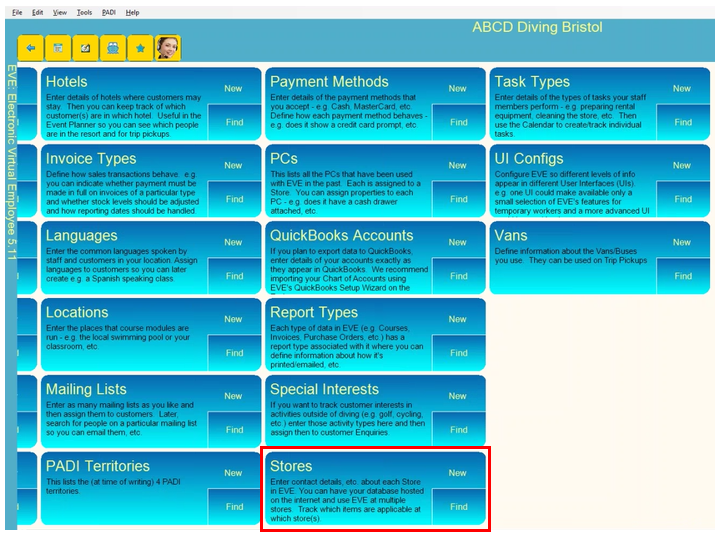
Next click on ‘Find’ in the ‘Stores icon’.
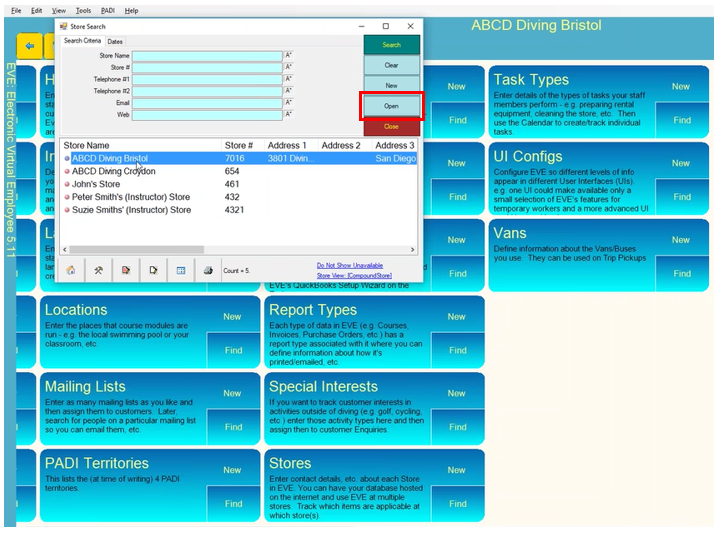
Click on the store you wish to configure to select it and then click the ‘Open’ button.
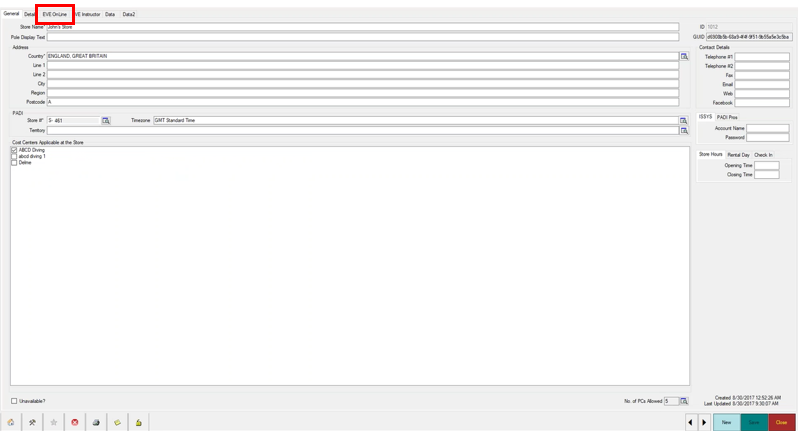
This will open the record for the store. You will see there is a series of tabs. Click on the ‘EVE Online’ tab.
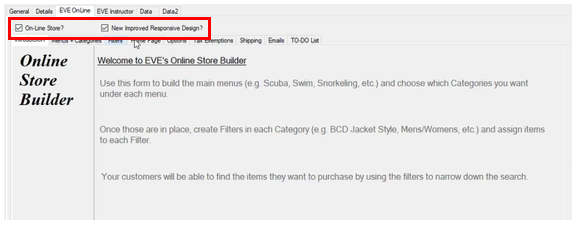
The introduction tab gives an overview of EVE’s Online Store Builder. You need to place ticks (by clicking) in the check box for ‘On-Line Store?’ and ‘New Improved Responsive Design?’.
Next click on the ‘Menus + Categories’ tab.
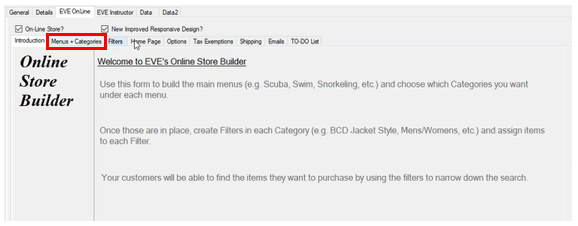
The ‘Menus + Categories’ tab is used to to define the menu and sub-menus for the online shop.
Click ‘(New Menu)’ on the ‘Menus + Categories’.
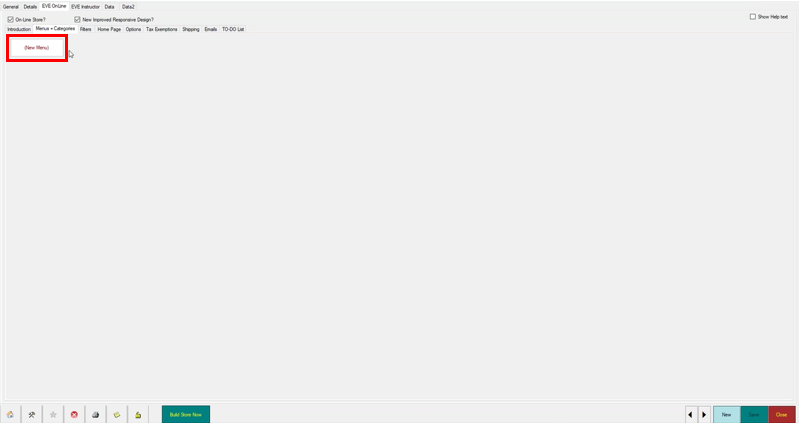
When you click ‘(New Menu)’ it will create a new box for you to type in text for a new menu item and then click ‘Enter’ on your keyboard to save it. Repeat this set of actions to add in more menu items.

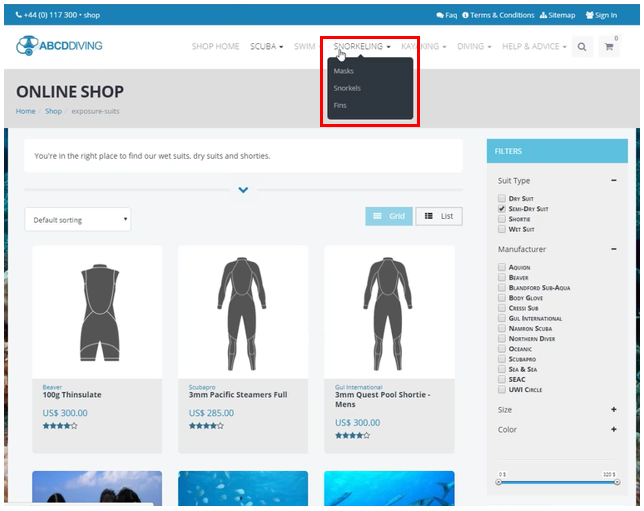
Each one of these new menu items will now be displayed in the EVE Online shop menu.
To create a sub-menu within a menu item you need to create new ‘categories’ for that menu item. There are two options to do this.
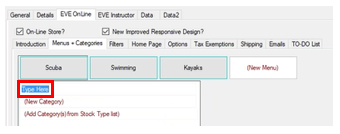
You can click on ‘(New Category)’:

This will create a new row where you need to type text (for example ‘BCDs’) for the new sub-menu item.
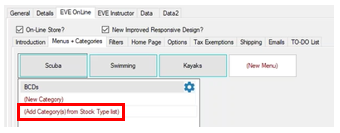
The second option to create a sub-menu item is to click ‘(Add Category(s) from Stock Type list)’. This is probably the preferred option as most dive businesses will want to have categories (sub-menu items) the same as their stock types.
This opens the ‘Create Categories?’ window and then you place ticks (by clicking) in the check boxes you wish to select and then click the ‘OK’ button to add them as new sub-menu items.
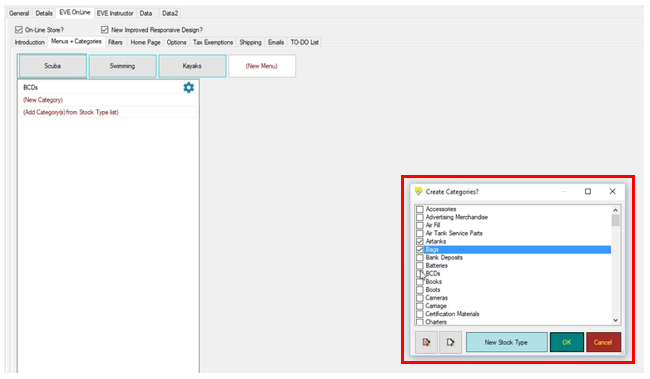
This will then open an ‘EVE’ warning window asking if you want to all the stock items from the stock types you have just selected by clicking ‘Yes’ or ‘No’ if you want to manually add the stock items to the category (sub-menu item) at a later date.

As you drag your cursor over the different categories in a menu item a ‘cog’ icon will appear.
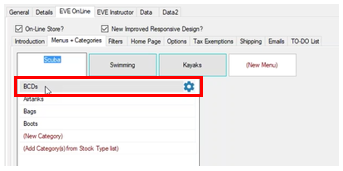
When you click the ‘cog’ icon it will open up an options window which allow to make changes to the category (sub-menu item):
- Add items
- View items
- Paste items (if you have copied the items onto the clipboard)
- Edit the category (rename/change sort order etc.)
- Delete the category
- Move the category to a different menu

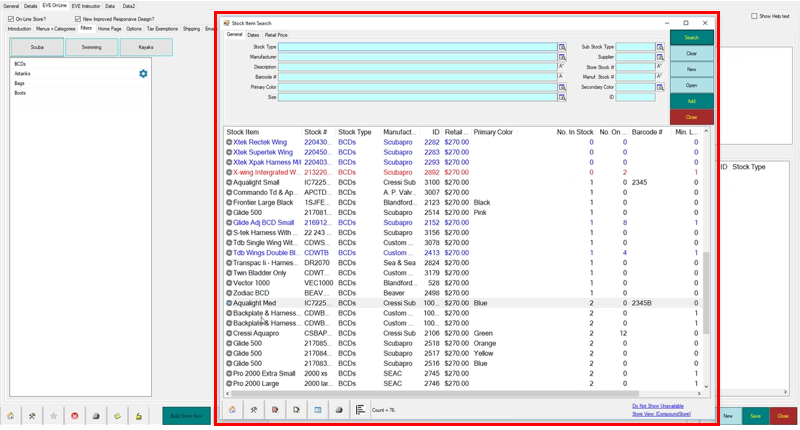
To add items click on the ‘Add items’ in the options window. This will open up an EVE ‘Stock Item Search’ window. Use the filter options (‘Stock Type’, ‘Manufacturer’, ‘Description’ etc.) as required to find the stock items you wish to add to the category.
Use the ‘Select All’ icon or hold down the control button on the keyboard and click the specific items you need to add to the category and then click the ‘Add’ button.
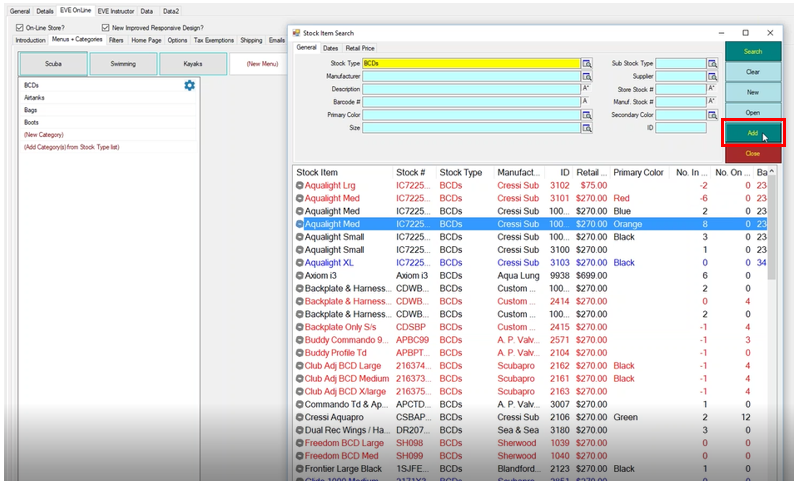
You must remember to click the ‘Save’ button to save and implement your changes.
Once you have finished adding your menu items, categories (sub-menu items) and the required stock items you need to click the ‘Filter’ tab.
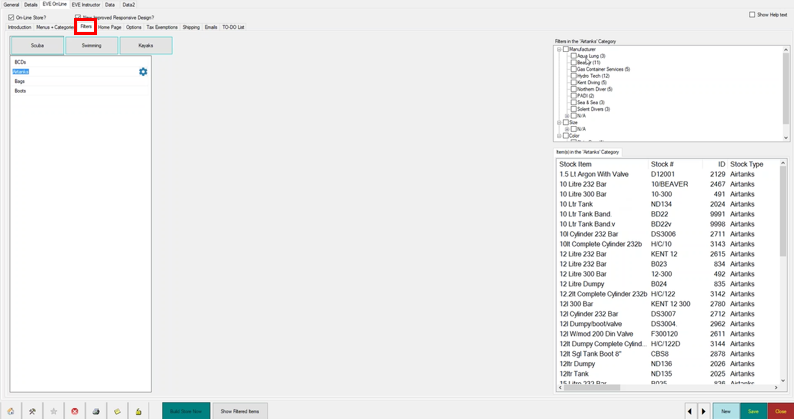
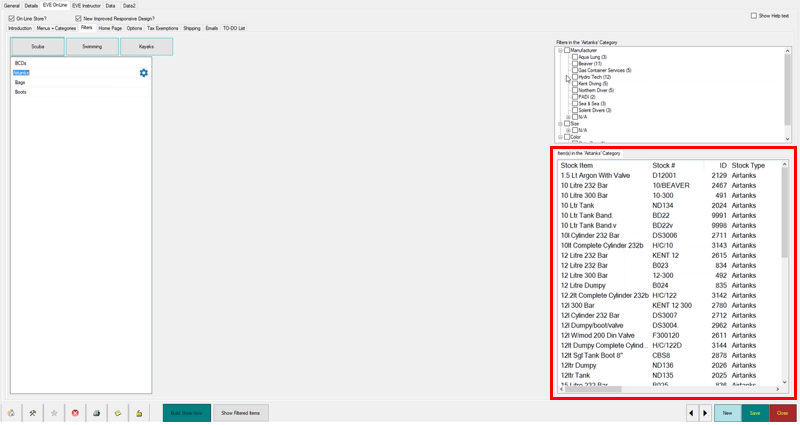
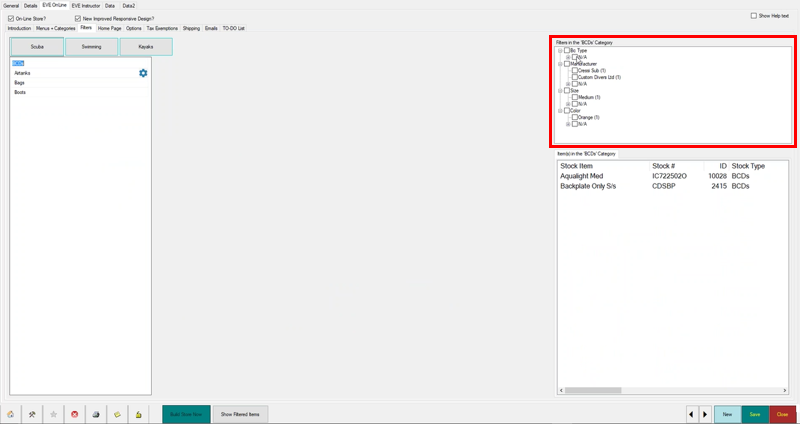
The ‘Filter’ tab will display your menu items and if you click on them they will display the categories that have been added. You will notice that there are two extra panels on the right hand side. When you click on a category on the left panel, the bottom panel on the right hand side will display what items have already been added.

The top panel on the right hand side is where you set up the filter options for your EVE Online Shop. As stock items in EVE already have a manufacturer, size and colour defined these will filter options will have automatically been set up.
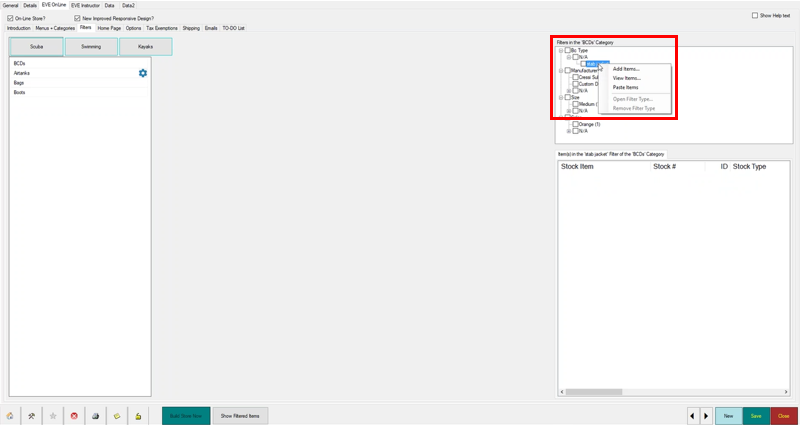
If the store doesn’t want to show a filter that has been automatically set up, for example ‘Manufacturer’, they can right click on the filter label. This will bring up the options window and then select the ‘Remove Filter Type’ option.
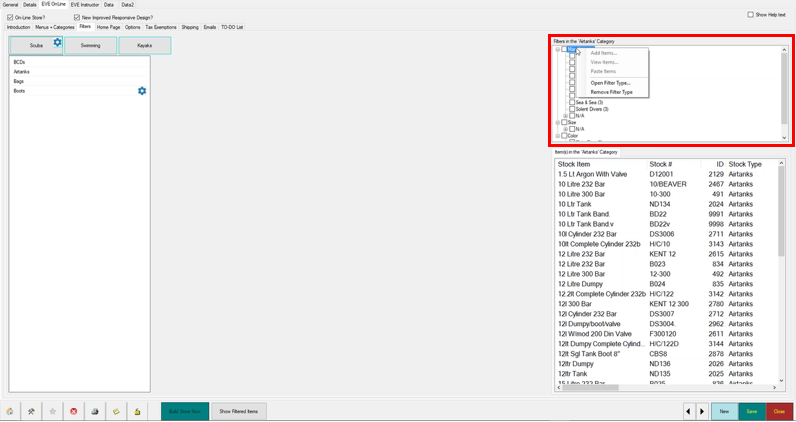
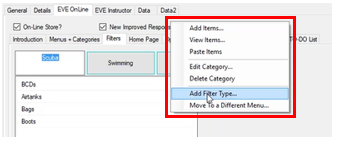
To add a filter type click on the cog icon of the desired category to bring up the options menu and select ‘Add Filter Type’.
This brings up the filter type menu and allows to you add in new ones or if you have accidentally deleted one you can add it back.
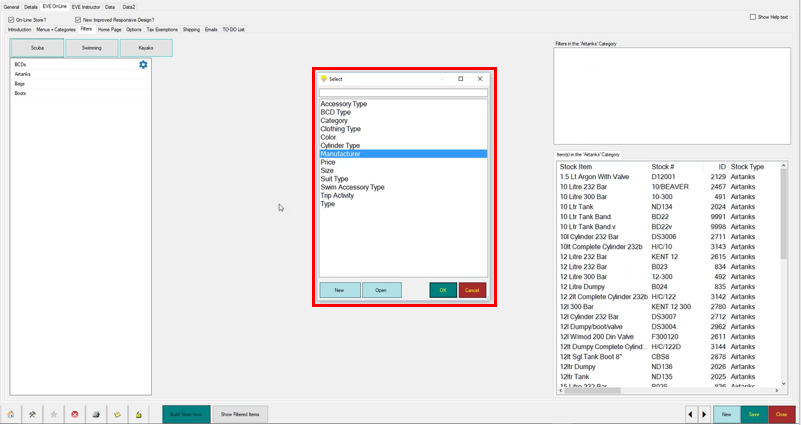
You can create a new filter type by clicking on the ‘New’ button in the filter type menu.

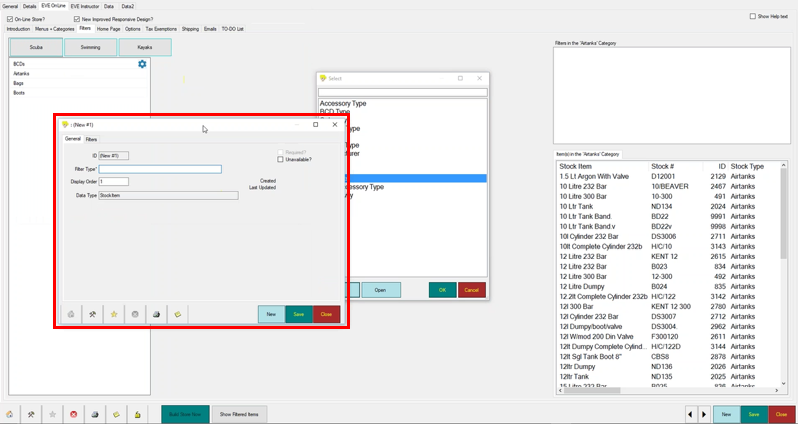
This brings up a new filter type window. In the ‘General’ tab you can enter the name for the filter into the ‘Filter Type’.
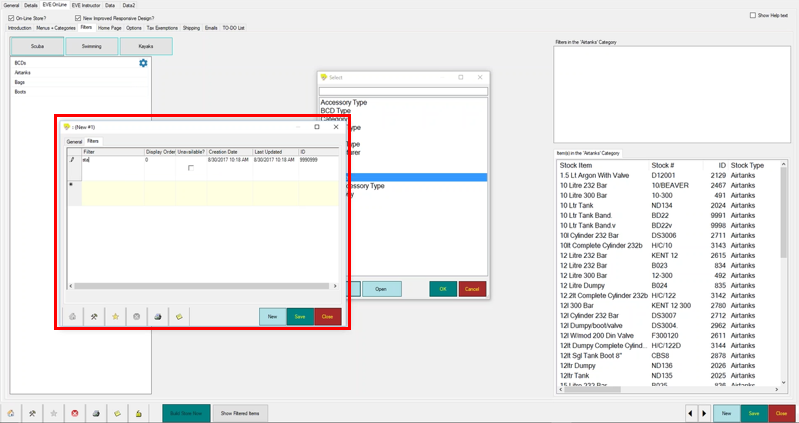
In the ‘Filters’ tab you can then enter the actual filters themselves. You must remember to click the ‘Save’ button to save and implement your changes.
Once the new filter type has been been added you can then assign stock items to it. Click on the category the filter has been added to and then in the ‘Filters in the ‘X’ category window’ you will see new the filter which will display ‘N/A’ as there are no items linked to that category.
When you click on the N/A ‘+’ it will then list all the filters that have been defined. When you right click on one of the specific filters it will bring up an options window. Select ‘Add Items’.
This will take you to the ‘Stock Item Search’ window which will allow you to select which items you want associated with the chosen filter.
The ‘Home Page’ tab is where you set up the options for the home page of your EVE Online Shop. You can choose the general layout from 5 different options.
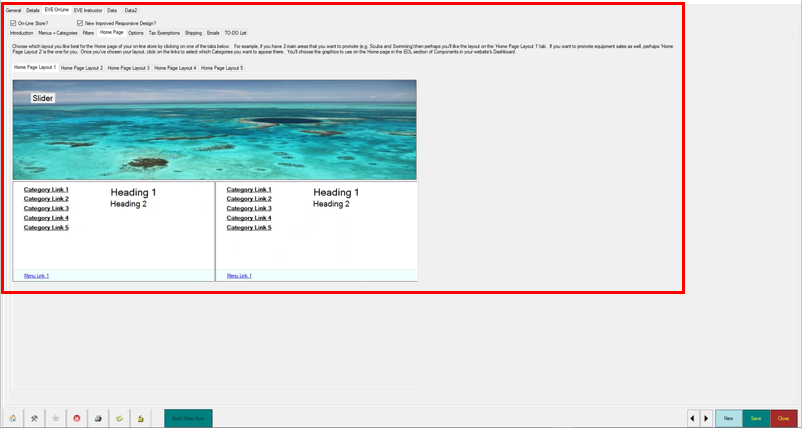
Once you have chosen which layout you want by clicking on the appropriate tab, you can then edit the category links by clicking on a link which opens up a window where you can then choose a category for the link to display. These can be changed at anytime.
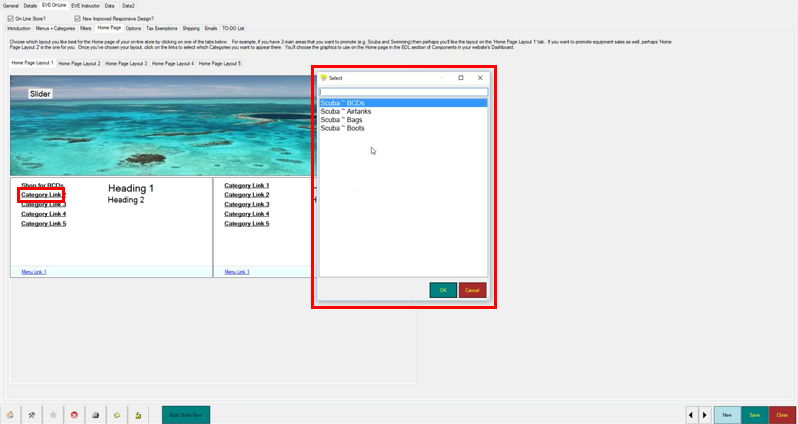
When you click on the ‘Menu Link 1’ link it will open a window so you can choose which menu to display. This will then change the ‘Heading 1’ and ‘Heading 2’ text.

The ‘Options’ tab allows you to link the new EVE Online Store to a ‘bricks and mortar’/physical store which allows you to maintain just one inventory list.
You link the EVE Online Store to a cost centre (which company the invoices will be created in).
You choose an employee whose name will be written to the EVE Online Store invoices.

On the ‘Tax Exemptions’ tab you can set tax exemptions for different types of sales (e.g. customers whose home address is in a different state or country).

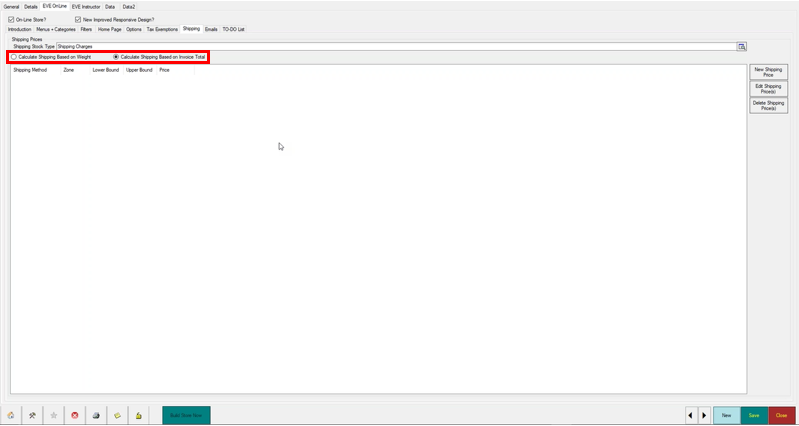
The ‘Shipping’ tab allows you to set up how shipping will be charged. You can set up different means of shipping and prices in this tab (e.g. FedEx, Royal Mail, UPS) and then the customer can choose which option they want at the checkout stage. Different prices can be set up for different locations in this tab.
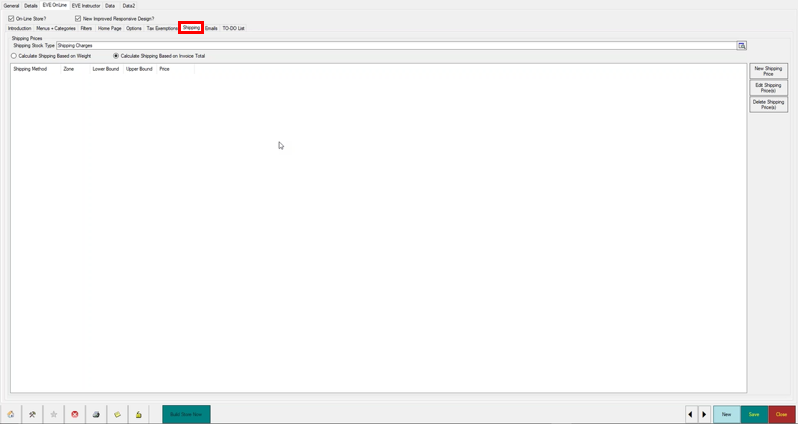
You have the option of setting the shipping prices based on invoice total or weight by checking the option you wish to implement.
To set up a new shipping price click on the ‘New Shipping Price’ button and it will bring up a shipping price window.
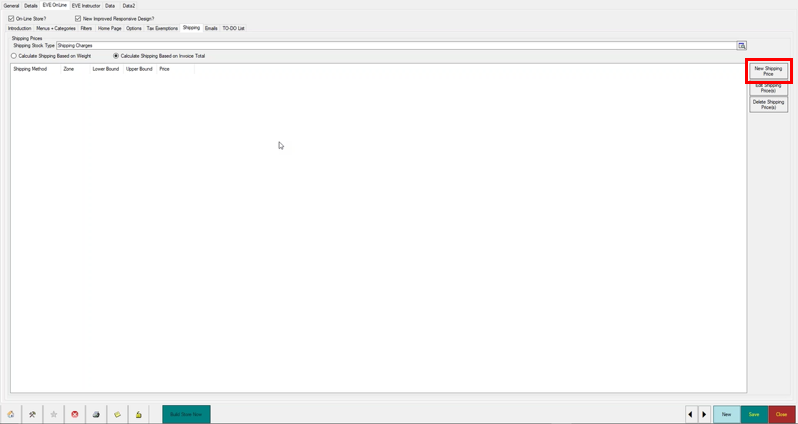
This window allows you to set up the:
- Shipping method
- Zone (the location – which can be a single country or combination of countries)
- Lower bounds (invoice minimum)
- Upper bounds (invoice maximum)
- Price (price of the shipping)

You must remember to click the ‘Save’ button to save and implement your changes.
The ‘Emails’ tab allows you to define the email address messages will be sent from, the email templates to be used and the email subject titles with merge fields.

The ‘To-DO List’ tab gives a list of potential issues to review and fix before they go live with their EVE Online Store. There are a series of sub-tabs which allow them to see what needs to be fixed:
- No Category
- No Price
- No Image
- Parent/Child Linking Issues
- No Weight
- No Product Description
- Packages
- Related Products
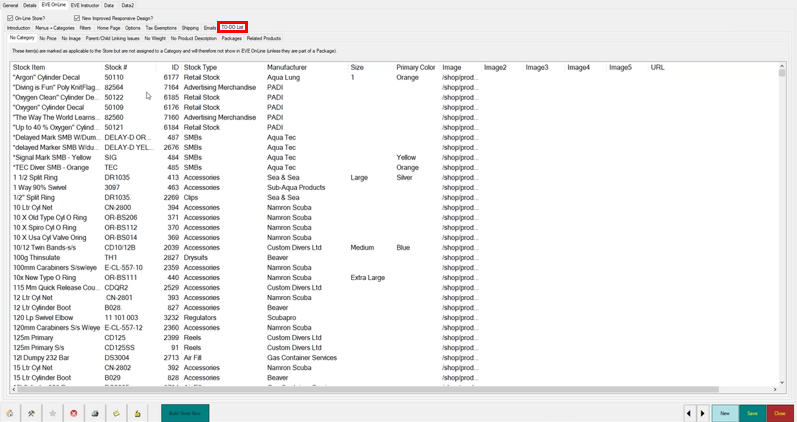
To solve any issues, click on the sub-tab and then double click on an item from that list and this will open the ‘Stock Item’ window so you can then add the missing information or image as required.
