Adding Customers to a Day Trip
Learning Outcome
On successful completion of this lesson, students will understand how to add customers to a day trip using the EVE Calendar.
Lesson
If you are using EVE for your Point of Sale you would normally add customers to courses and trips from a sales invoice. If you are not yet doing this follow the instructions below.
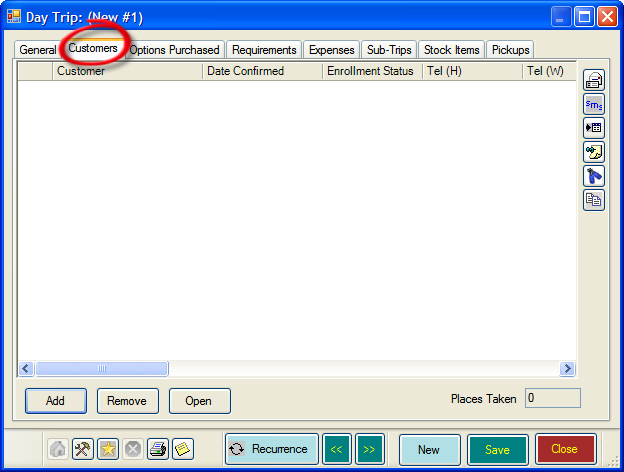
- In Calendar, open the Day Trip you wish to add the customer to by double-clicking it.
- Click the ‘Customers’ tab, then the ‘Add’ button
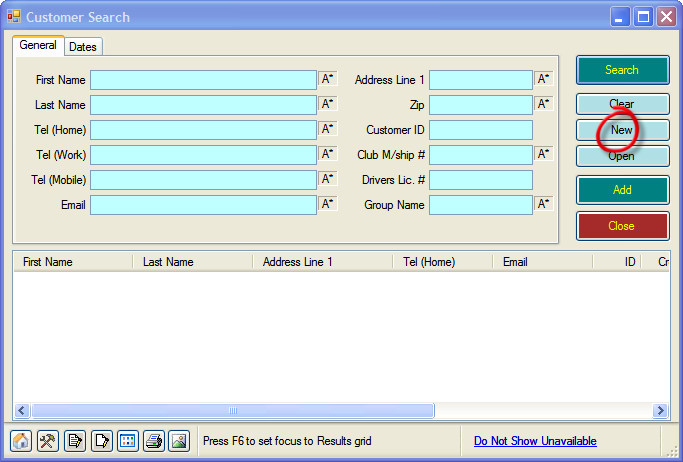
- The ‘Customer Search’ box will open.
- For existing customers
- If the customer is already in EVE you can type their name into the First Name / Last Name fields. As you type EVE will present the results in the box below. Once you have found the customer, double-click the name to add them to the day trip.
- For new customers
- Click the ‘New Button’.
- For existing customers
-
-
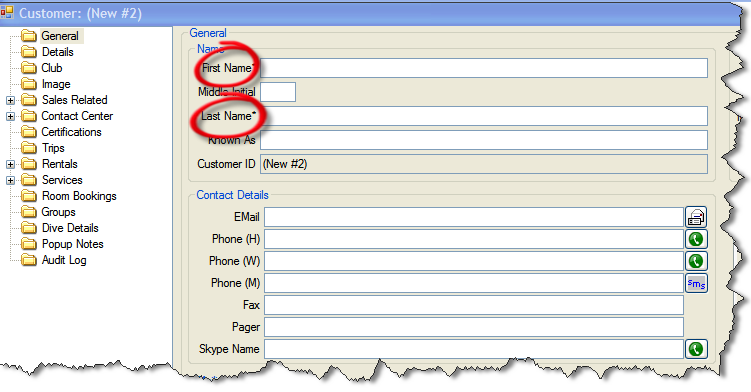
- A New ‘Customer Record’ form will open. At this stage the only required information is ‘First Name and Last Name’. All the other fields are optional unless you have elected to make them required. See the Customers section for more details.
-
-
-
-
- Once you have added the information you want, click the ‘Save’ button, then ‘Close’.
- You will be returned to the ‘Customer Search’ box. Double-click on the customer you have just created (they will already be highlighted) to add them.
-
-
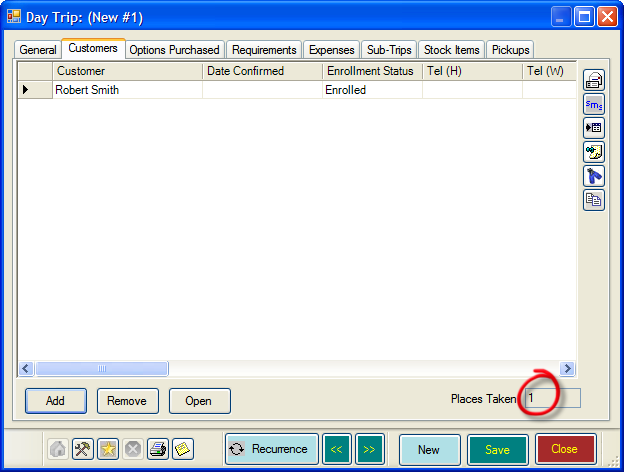
- You will now be returned to the ‘Day Trip’ box. The customer will have been added and the ‘Places Taken’ box will have increased by one.
- You can now allocate equipment to the customer if you wish. Follow the “Allocating Equipment to a Day Trip or Trip Customer” guide for more information.