Exporting Data to QuickBooks
Learning Outcome
On successful completion of this lesson, students will understand how to export data to QuickBooks.
Lesson
Running the QuickBooks Export
When you have completed all tabs of the QuickBooks Setup Wizard, you are ready to try the export. It is a two-stage process:
- Export the data from EVE to a file. This file has an IIF extension.
- Import the data into QuickBooks. Do this by loading your company file in QuickBooks and then clicking File then Utilities then Import.
To perform stage one, use the Export option under QuickBooks in the Tools menu.
QuickBooks Export
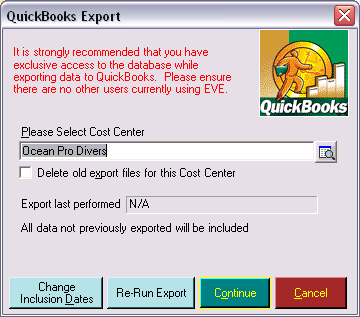
The list will have one entry for each Cost Center you have defined in EVE. If you have more than one Cost Center you will need to run the export for each one (as each Cost Center corresponds to a different physical company). Select the Cost Center you want to deal with. Each time you run the export, an export file is produced. By default the file is located in c:\Program Files\Integrated Scuba Systems\User\Export and is called qb_***_yyy.iif where *** is the name of the Cost Center and yyy is the date/time the export was performed. As mentioned above, once the export file is created, you need to import it into QuickBooks. EVE has no way of knowing when and if you have imported that data, and so it cannot delete the file at this time. If you are not careful you may end up with a number of IIF files in your export folder so be careful to import the correct one. If you check the delete old export files for this Cost Center box, EVE will delete all existing IIF files for the Cost Center before running the new export.
Usually, you will click Continue at this point to export all data that has not previously been exported. As part of the export process, EVE will assign an accounting period (comprising a unique ID and the date/time of export). Each EVE transaction included in the export file will be updated with the accounting period ID. This allows you, at a later date, to determine exactly which transactions were included.
Change Inclusion Dates
In some circumstances, you may want to create an export file containing data in a specified date range. In this case, click Change Inclusion Dates.
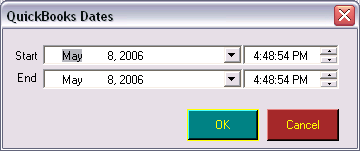
Choose your date range and click OK to create the export file.
Re-Run Export
In some cases you may want to re-run an export for a particular accounting period. In this case, click Re-Run Export. This lists all previous accounting periods so you can choose one. When you then click Continue to start the export, data that is part of the selected accounting period will be exported.