Invoicing the Rental Bookings
Learning Outcome
On successful completion of this lesson, students will understand how to create a new invoice for a rental booking.
Lesson
Sending a Rental Booking to a New Invoice
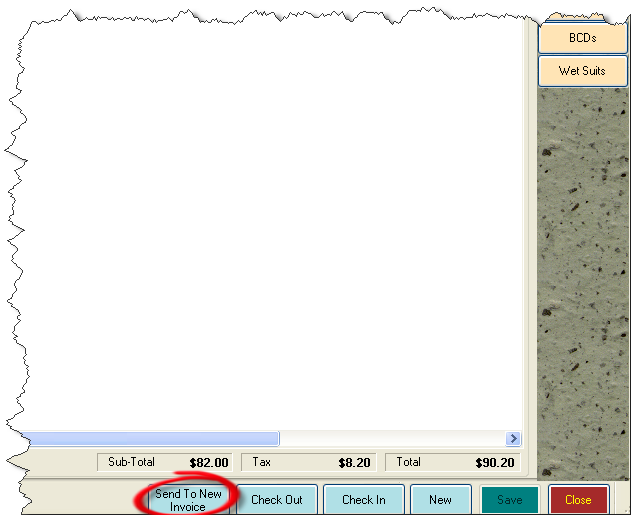
- Once you have completed the booking and are ready to take payment from the Customer, click on the ‘Send to New Invoice’ button at the bottom of the Rental Booking screen
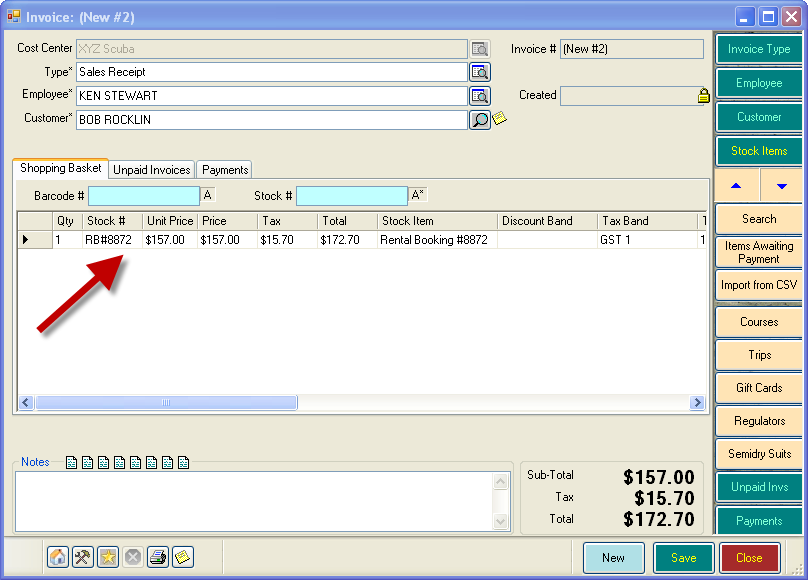
- EVE will create a new invoice with all the rental items already added. How these items are displayed will depend on how you setup your rental prices in the ‘Setting Up Rental Prices’ section at the start of this module.
Using Option 1 – Rental Prices Set for Individual Items
- If you have used this option, EVE will calculate the total of the individual items and present it as one line item in the invoice.
- If the customer qualifies for a discount for taking a full equipment rental, for example, click in the ‘Discount Band’ column and select click again on the icon that appears.
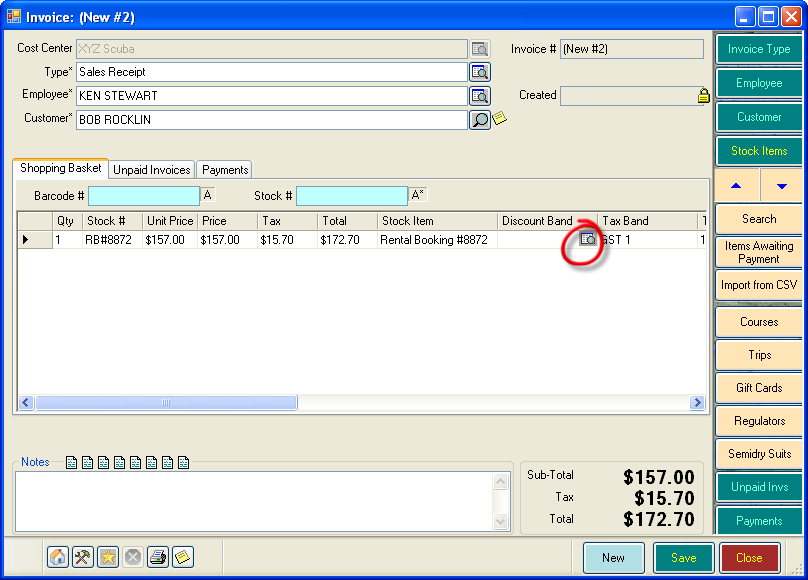
- The ‘Select Discount Band’ box will appear. Selct the appropriate discount band and click ‘OK’.

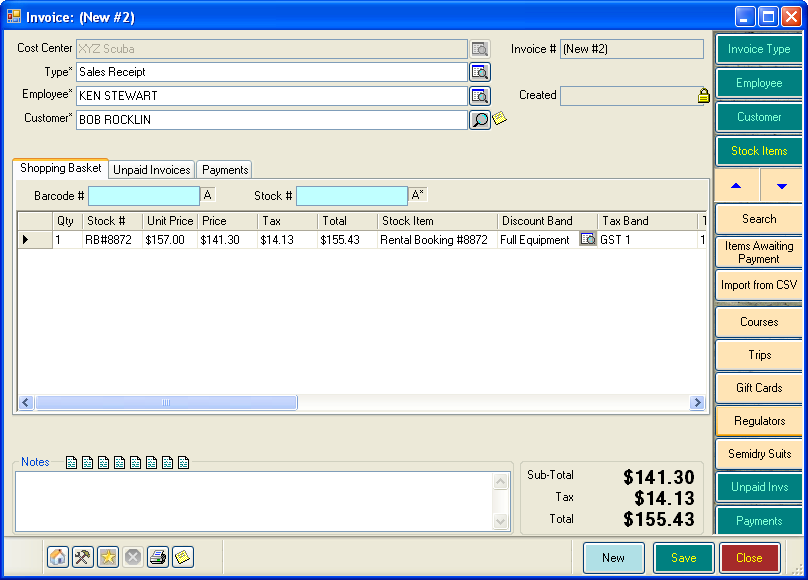
- EVE will reduce the price by the appropriate discount.
- Complete the invoice as normal. See the ‘Sales Module’ section of this User Guide for more details
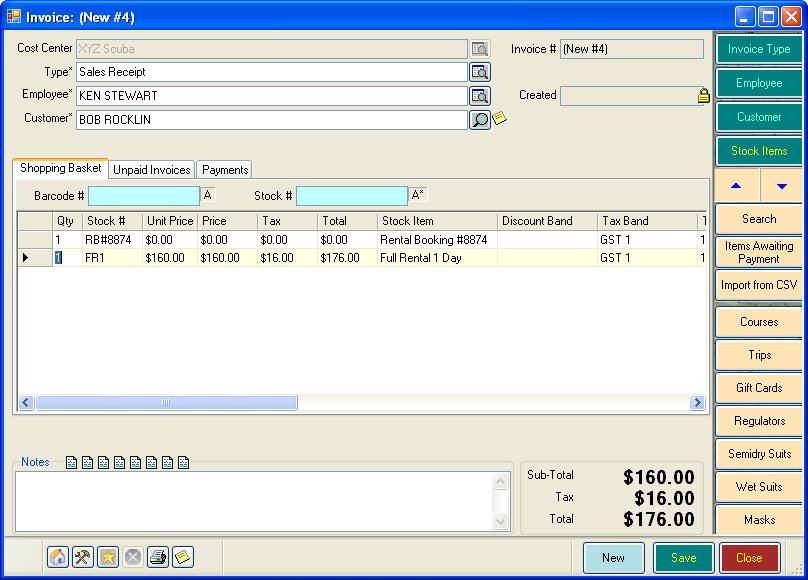
Using Option 2 – Rental Prices Set for Individual Items
- If you have used this option, EVE will once again present the booking as one line item, however this time it will have a price of zero.
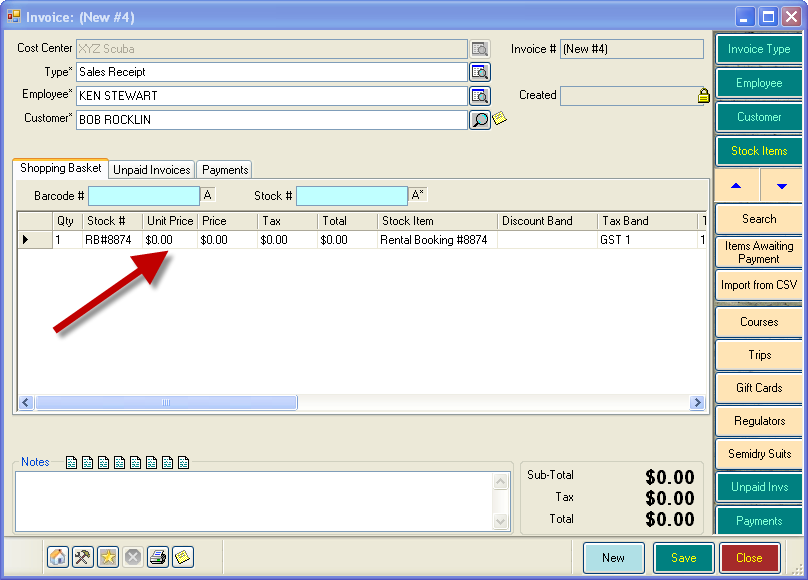
- You will now add the appropriate stock item to the Invoice, for example ‘Full Equipment Rental 1 Day’. You can do this either though using ‘Search’ or, if you are using a barcode scanner; you could simply scan the item in from a card of barcodes.
- Complete the invoice as normal. See the ‘Sales Module’ section of this User Guide for more details