This tutorial will provide you with the instructions to create a popup form on your EVE website.
The feature is available exclusively with an EVE Website.
The popup form will run the following automatic tasks:
1) Collect the Student data details, required to assign the free eLearning code
2) Create a customer record in EVE, for the student
3) Add the student to a generic course date, in EVE
4) Send the OW eLearning Section 1 free code to the student
To create the popup form:
1) Launch your EVE website, login to the CMS and click the Components tab
2) Scroll down and click on Manage popups
3) Click the Create a New Popup button

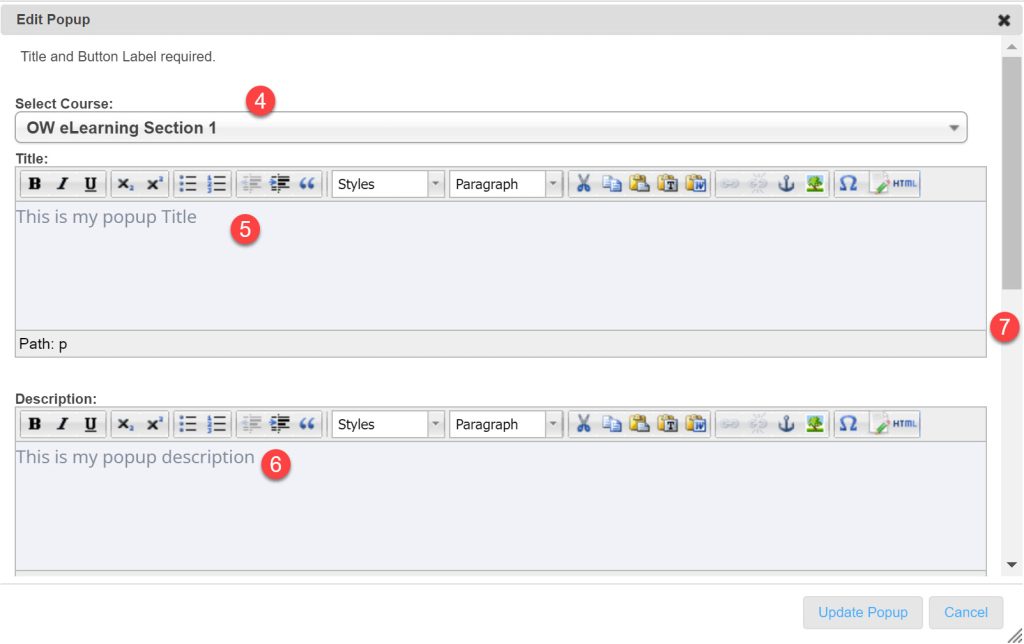
4) Set the Course type to OW eLearning Section 1 or any available free section
5) Set the popup Title
6) Set the popup description
7) Scroll down for further fields
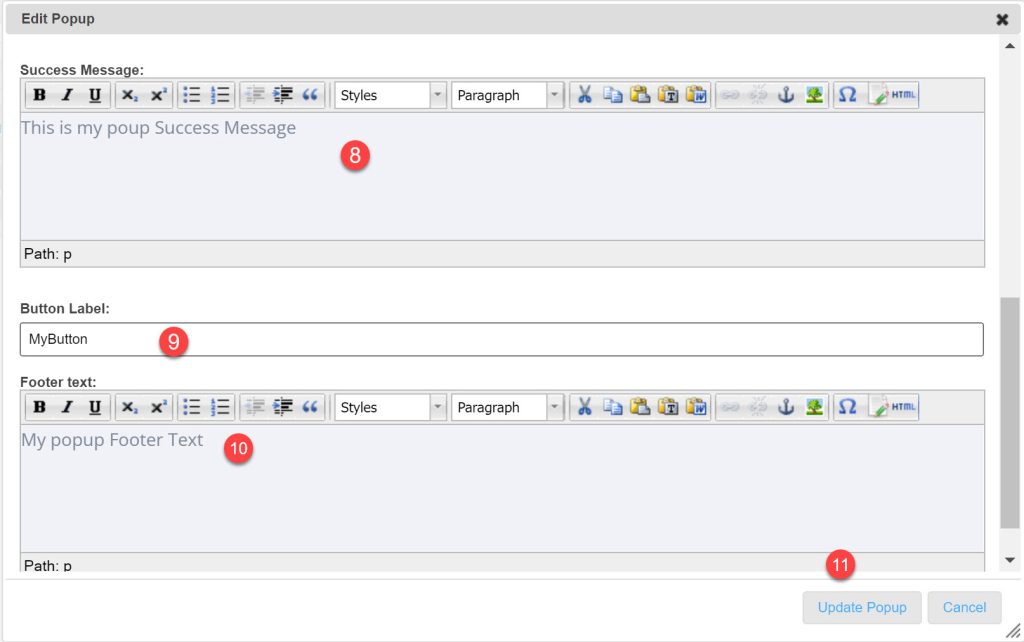
8) Type the message to display on successfully submitting the popup
9) Type the button label. It can be set, for example, to Send or Submit
10) Type your Footer text
11) Click Update Popup
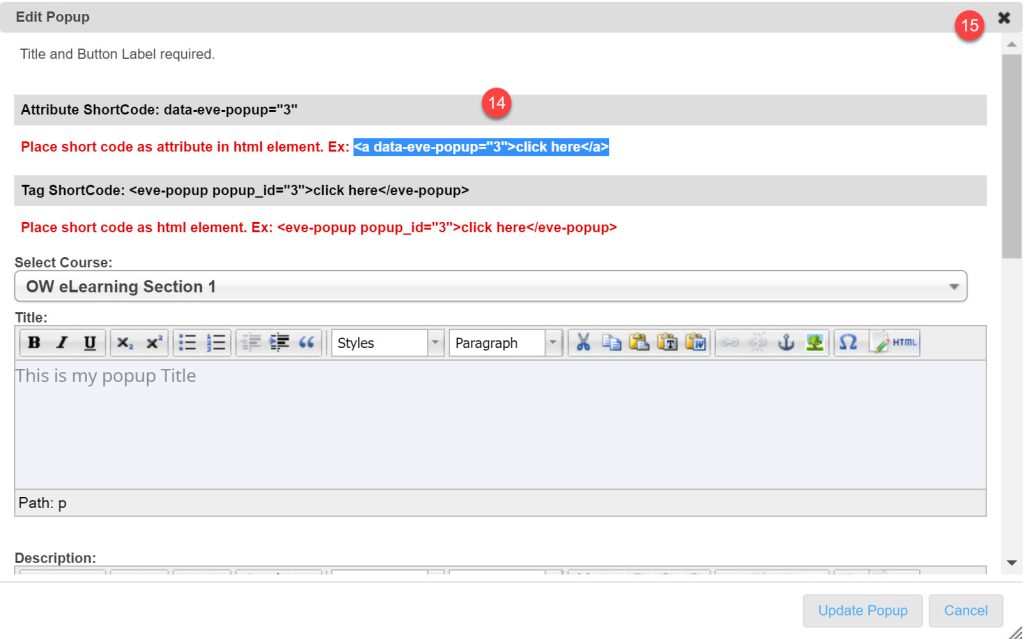
12) Return to the popup list
13) Click on your newly created popup record

14) Select and copy the text highlighted in blue
15) Close the window
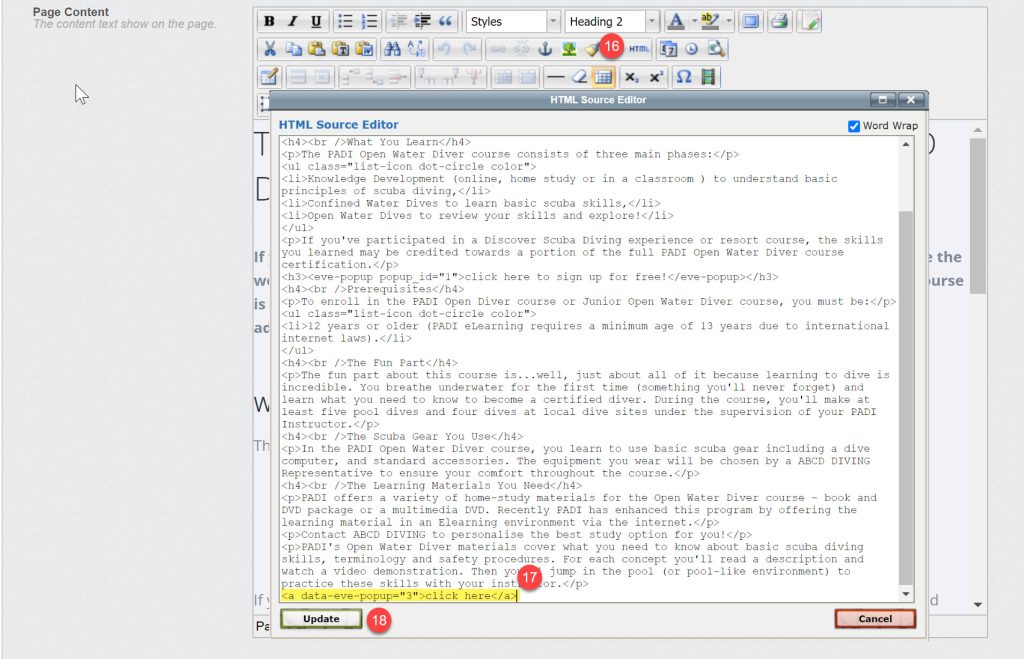
16) Go to Web Pages, open the page where you wish to add the popup and click the HTML button
17) Paste the copied text to the HTML Source Editor window
18) Click Update
19) Save the page changes

20) in EVE > Data > Course Types open the corresponding course type: OW eLearning Section 1
21) Check the Auto-assign a Registration Code when student uses a Popup sign-up form on EVE Website
22) Select the Generic Course Date
23) Select the Product Type by clicking the look up button
24) Save the newly applied settings

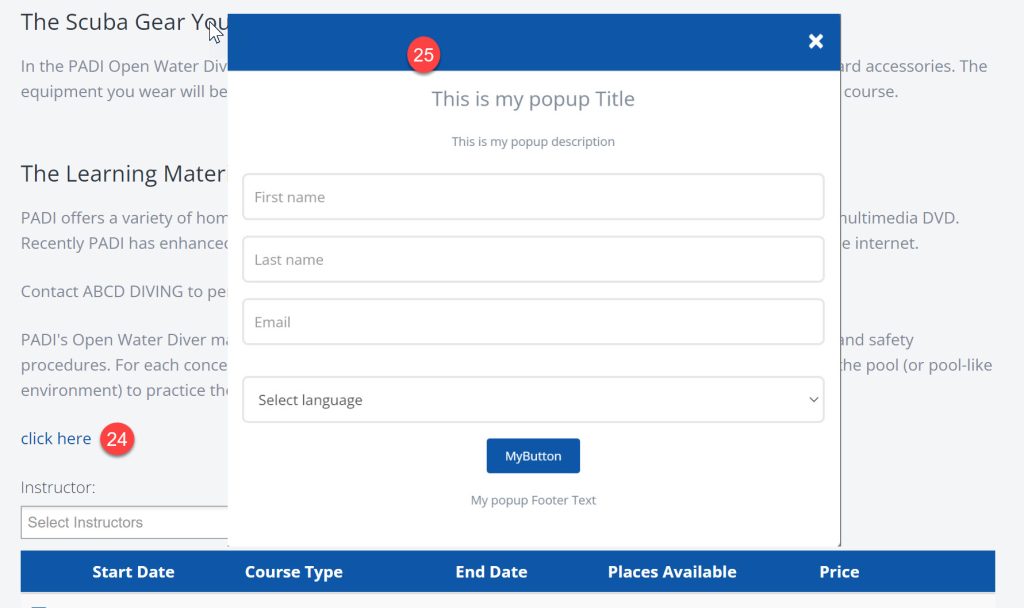
24) Return to your EVE website and open the page where you added the popup. It will display the corresponding link
25) When you click the link, the popup form will open
Click here to see it in action, on the EVE website of a successful PADI store.


Comments are closed.